This protocol details the application and use of Culture-Insert 2 Well (ibidi, 80209) on the CytoView MEA 6-well plate. The inserts specified in this document have two separate compartments that allow for compartmentalization of two cell populations on the array. Removal of the insert then allows the distinct cell populations to connect over time.
Prepare the MEA plate
- Spray the CytoView MEA 6-well Plate Package using 70% ethanol and transfer it to the biosafety cabinet.
- Coat the wells of a CytoView MEA 6-well plate with the appropriate surface coating treatment (PEI/laminin, PDL, Fibronectin, etc.) and incubate for the time prescribed in your specific protocol.
Note: We recommend coating the entire surface of the well, as opposed to a droplet over the array, when using a Culture-Insert 2 Well (ibidi, 80209).
Attaching the Culture-Insert 2 Well into the MEA plate
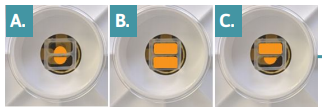
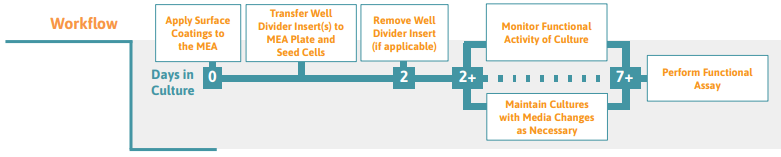
Spray the Culture-Insert 2 Well tray (Fig. 1A) using 70% ethanol and transfer it to the biosafety cabinet.
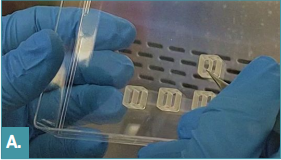
Open the Culture-Insert 2 Well tray and use a pair of tweezers to grasp a Culture-Insert 2 Well along the center divider (Fig. 1B). The bottom of the insert has an adhesive layer so removal from the container may require a gentle tug. Be sure to keep this adhesive layer face down when placing on the MEA surface.
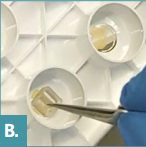
Gently place the Culture-Insert 2 Well into one well of a 6-well plate such that the center line is over the middle of the microelectrode array (Fig. 1C). The insert divisions can be oriented either horizontally or vertically, by preference. Check the placement using a microscope, noting which electrodes are covered by the insert.
Note: The Culture-Insert 2 Well will block approximately 2 columns or 2 rows (depending on orientation) of the microelectrode array.
- If alignment is acceptable, use the blunt end of the tweezers to press down gently on the corners of the Culture-Insert 2 Well. This will secure the adhesive to the surface. Do not press on the divider in the center of the insert.
Addition of the Neural Cell Cultures
- Prepare the neural cells for plating according to protocol requirements.
- Add cells to each compartment of the Culture-Insert 2 Well. In each section of the insert, the cells may be added as a droplet (e.g. 5-10 µL) over the electrode array along the central divider, or by filling the entire area (e.g., >50 µL of cell suspension). See (Fig. 3A-C) for examples.
- Transfer the plate to an incubator at 37oC and 5% CO₂ to allow for cell attachment according to the standard cell culture protocol, typically 1 hour.
- If the cells were plated in droplet form, add up to 100 µL per compartment to feed the culture and to prevent the droplet from drying out.
Culture-Insert 2 Well Removal to Allow Functional Connection of the Neural Cocultures
- Remove the Culture-Insert 2 Well after the cells have attached to the surface (~1-2 days).
Using a pair of tweezers, grasp the center divider near the top or bottom edge of the Culture-Insert 2 Well and gently twist to lift.
Note: If the insert is left in the well too long (e.g., 4+ days), the strength of the functional connection between the neural co-cultures may be impaired long-term.